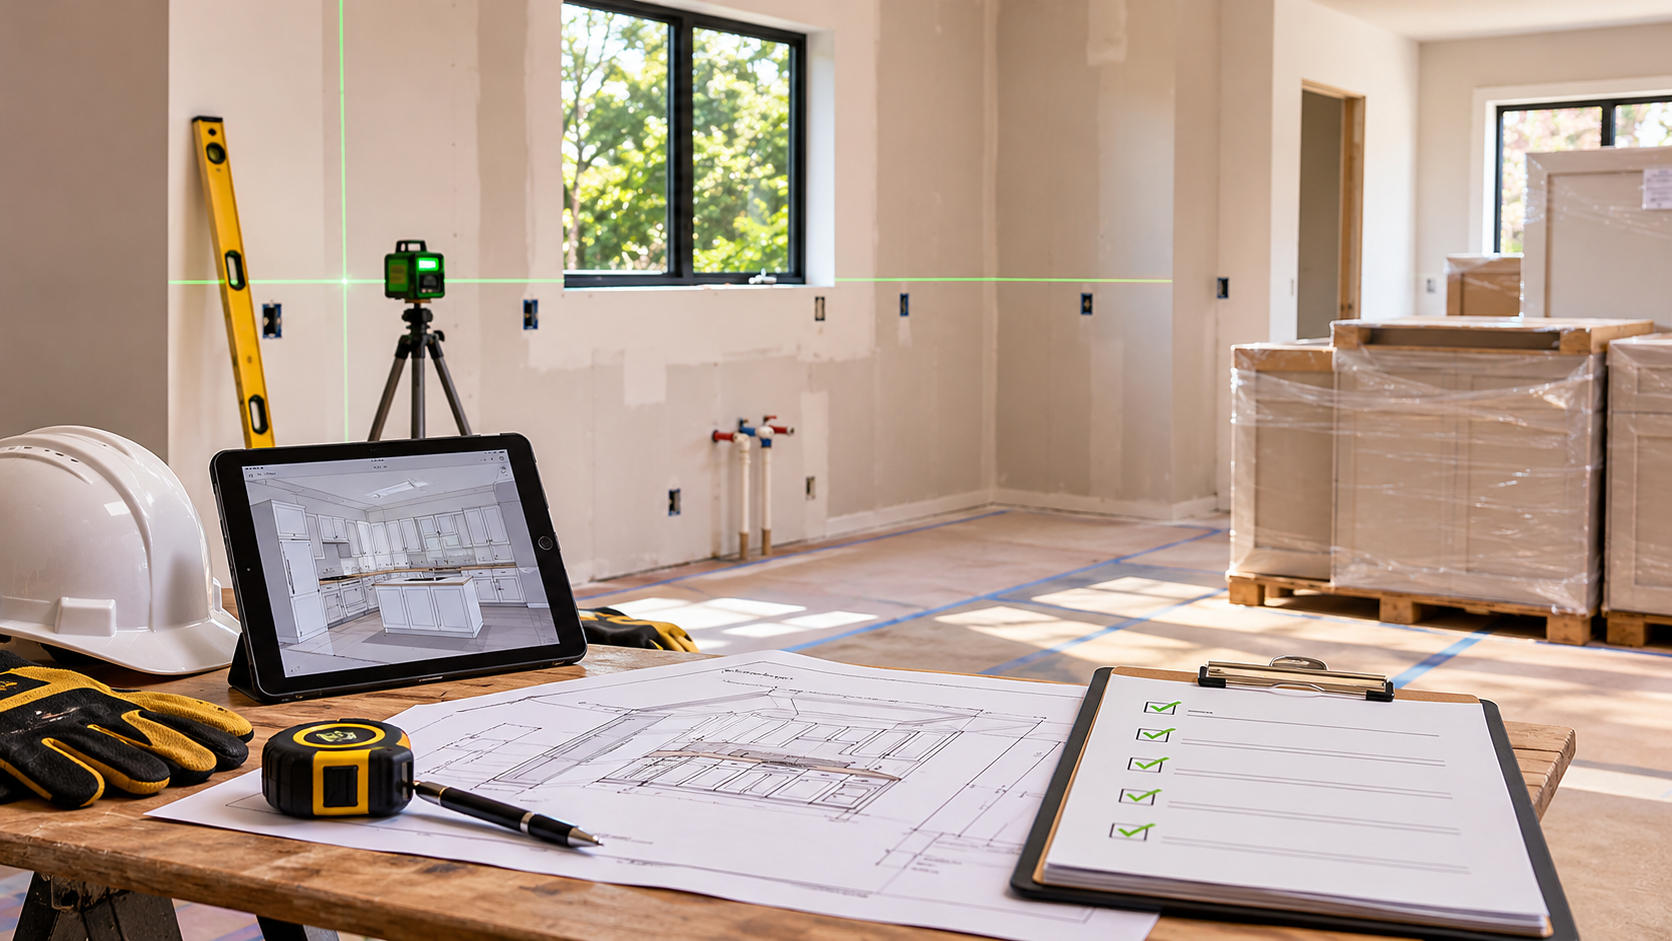

Preparing a jobsite properly before kitchen cabinet installation can make a significant difference in project efficiency, installation quality, and scheduling. Even when cabinets have been ordered, delivered, and inspected, the installation area may not be ready for the next stage of construction.
For general contractors, kitchen remodelers, builders, and cabinet installers, jobsite preparation involves more than clearing the room. Walls and floors must be evaluated, plumbing and electrical work must be coordinated, appliance dimensions must be verified, and the installation area must provide safe and practical access for the crew.
A lack of preparation can lead to avoidable delays, additional labor, cabinet adjustments, and coordination problems between trades.
In this guide, we’ll explain how to prepare a jobsite for kitchen cabinet installation, what contractors should verify before the installation crew arrives, and how to organize the work area for a more predictable project.
Why Jobsite Preparation Matters Before Cabinet Installation
Kitchen cabinets depend on the conditions of the surrounding space. Uneven floors, walls that are not plumb, unfinished utility connections, or incorrect appliance clearances can affect how cabinets fit and align.
Addressing these conditions before installation helps contractors:
-
- Identify potential construction issues before they affect cabinet placement.
- Coordinate plumbing, electrical, and other trade work.
- Reduce interruptions during installation.
- Protect delivered cabinets and finished materials.
- Keep the project aligned with its construction schedule.
- Avoid unnecessary adjustments and additional labor.
For larger residential developments and multifamily projects, preparation becomes even more important because several kitchens may need to be completed according to a shared construction schedule.
Steps for Jobsite Preparation
1. Confirm the Approved Cabinet Layout and Project Documents

Before preparing the physical installation area, make sure the team is working from the latest approved cabinet layout and project documents.
The installation drawings should reflect the final cabinet configurations, appliance locations, dimensions, fillers, finished panels, and any project-specific requirements.
Review the following information:
-
- Final cabinet layout and installation drawings.
- Cabinet schedule and product specifications.
- Base, wall, and tall cabinet locations.
- Appliance dimensions and opening requirements.
- Sink and plumbing locations.
- Electrical outlets, switches, and lighting locations.
- Finished end panels, fillers, and decorative components.
- Any approved changes made after the original drawings.
If revisions have been made during construction, confirm that the installation team has the latest version. This is particularly important for multifamily developments where similar kitchen layouts may have unit-specific differences.
Contractors preparing larger cabinet orders can also review our guide on creating a kitchen cabinet order checklist for multi-unit projects.
2. Evaluate Walls, Corners, and Installation Surfaces
Wall conditions directly affect cabinet alignment and fastening.
Before installation begins, inspect the walls where the cabinets will be mounted. Look for uneven surfaces, damaged drywall, protrusions, moisture-related issues, and areas that may require repair.
Important checks include:
-
- Inspect wall surfaces for significant bumps, depressions, or damage.
- Check whether wall corners are reasonably square.
- Verify that the installation surfaces are suitable for the specified cabinet mounting system.
- Identify wall studs and confirm their locations.
- Check for existing blocking or backing where additional support is specified.
- Confirm that wall repairs and finishing work are complete.
3. Locate and Mark Wall Studs
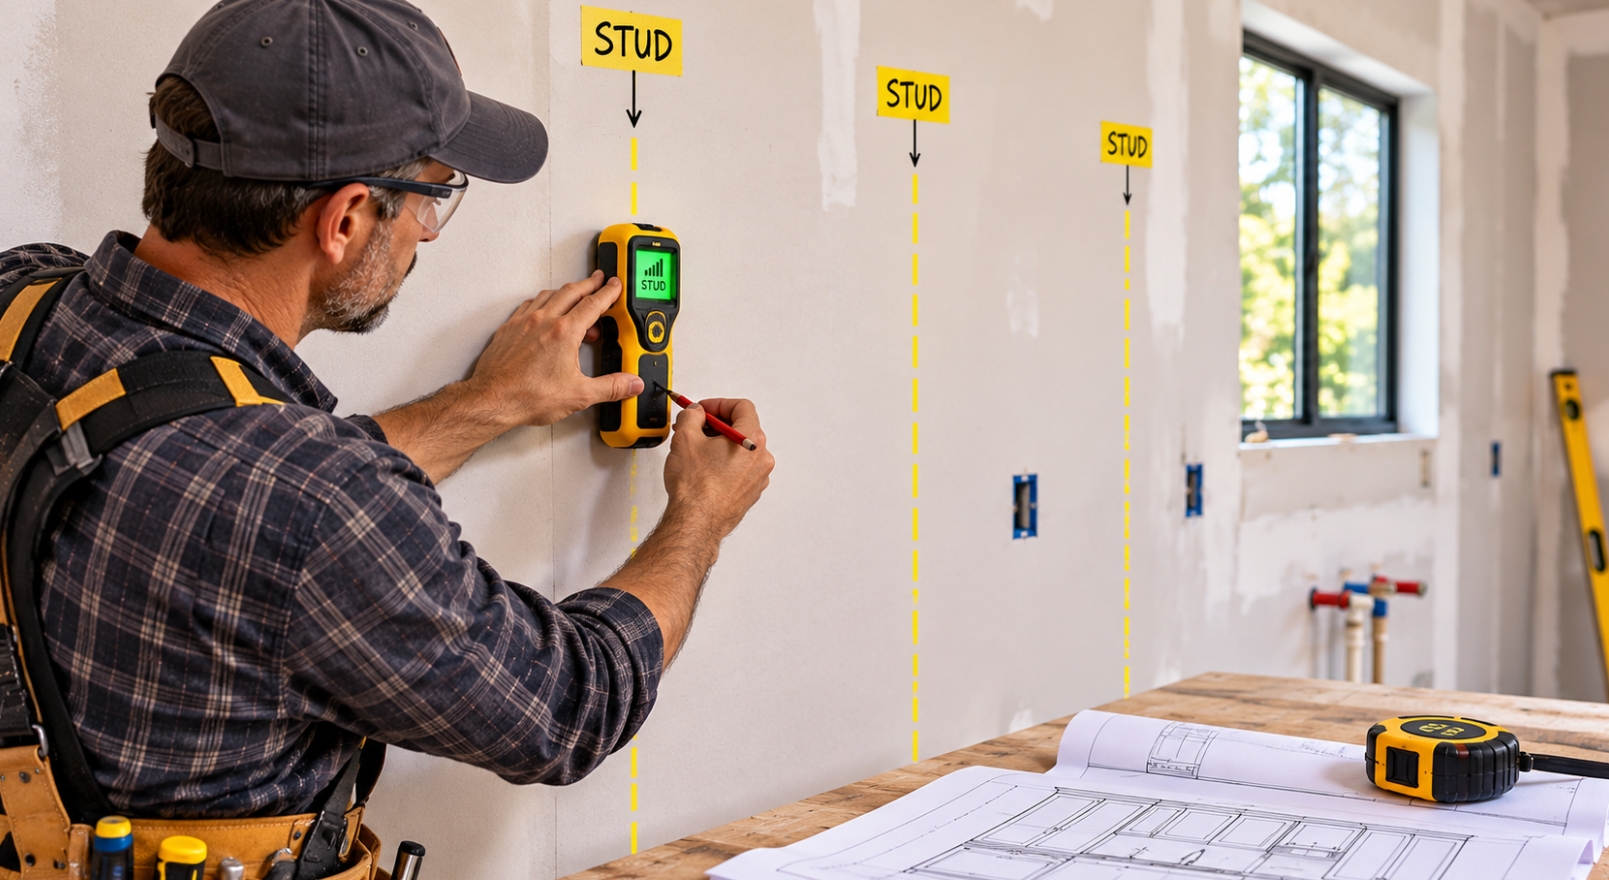
Wall studs provide the structural support needed for many common cabinet mounting systems. Use an appropriate stud finder and verify the locations before marking them on the wall.
Transfer the confirmed locations to the installation layout so the crew can identify potential fastening points. Where the approved design calls for additional blocking or backing, confirm that it has been installed before the wall is closed.
Do not assume that standard stud spacing will be consistent throughout an existing building. Older homes, remodeled spaces, and modified framing may require additional verification.
The correct fastening method also depends on the wall construction and cabinet manufacturer’s instructions.
4. Check Floor Conditions and Flooring Completion
Floor conditions can affect the finished height and alignment of base cabinets.
Before installation, inspect the floor for uneven areas, damaged sections, moisture problems, and unfinished work.
Contractors should:
- Check the floor for significant high and low areas.
- Identify the highest point along the cabinet installation area.
- Confirm whether the subfloor is stable and ready for the next construction stage.
- Verify whether the selected flooring should be installed before or after the cabinets.
- Confirm the finished flooring thickness where it affects appliance clearances.
- Protect completed flooring from installation-related damage.
5. Coordinate Flooring With Cabinet Installation
The correct installation sequence depends on the flooring material and the manufacturer’s requirements.
For example, some flooring systems are installed beneath cabinets, while floating floors generally require specific installation clearances and should not automatically be treated like fully adhered flooring.
Contractors should confirm the flooring manufacturer’s instructions before deciding on the installation sequence.
This is especially important when a dishwasher, range, or other appliance must fit beneath or between finished countertop and cabinet surfaces.
A small difference in finished floor height can affect appliance installation and final alignment.
6. Coordinate Plumbing Before Cabinet Installation
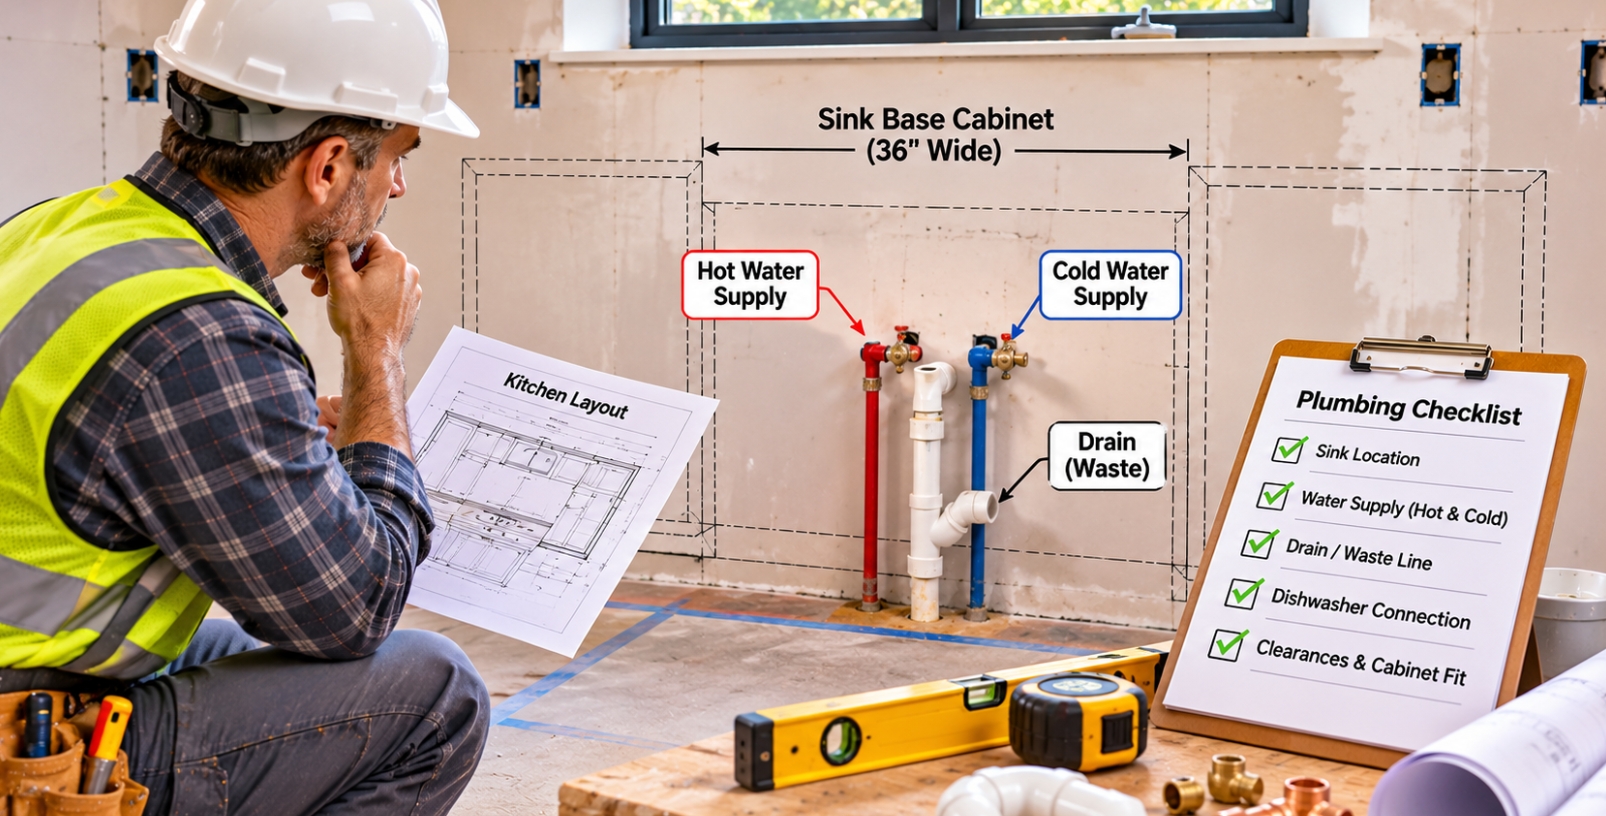
Plumbing rough-in work should be reviewed before cabinets are positioned. Sink base cabinets, dishwasher openings, and other plumbing-related areas require the correct locations and clearances.
Check the following:
-
- Confirm the planned sink location.
- Verify water supply line positions.
- Confirm drain and waste pipe locations.
- Review dishwasher water and drain connections.
- Check whether any plumbing changes are still outstanding.
- Confirm that pipes will not interfere with cabinet interiors, drawers, or structural components.
If the approved cabinet layout has changed, compare the plumbing locations with the latest drawings.
Any required relocation or modification should be completed by an appropriately qualified plumbing professional before the cabinet installation begins.
7. Verify Sink Base Cabinet Requirements
The sink base cabinet often requires additional coordination because plumbing connections occupy space inside the cabinet.
Confirm that the selected cabinet configuration accommodates the planned sink, faucet connections, drain assembly, and other specified components.
Do not rely exclusively on standard cabinet dimensions. Actual sink and plumbing requirements should be checked against the approved product specifications.
8. Complete Electrical and Lighting Coordination
Electrical work should also be coordinated before cabinet installation. Outlets, switches, appliance connections, and under-cabinet lighting can affect cabinet placement and the finished appearance of the kitchen.
Review these items before the installation crew arrives:
-
- Refrigerator electrical connection.
- Range or cooktop electrical requirements.
- Dishwasher connection.
- Microwave and other built-in appliance requirements.
- Countertop receptacle locations.
- Under-cabinet lighting wiring.
- Range hood and ventilation connections.
- Switch locations and accessibility.
The exact requirements depend on the kitchen design, appliances, applicable electrical codes, and local inspection requirements. Electrical work should be performed and inspected by qualified professionals where required.
9. Check Under-Cabinet Lighting Locations
If the design includes under-cabinet lighting, verify that the wiring and connection points are coordinated with the final cabinet layout. Poorly positioned wiring can create unnecessary modifications after the cabinets have been installed.
Confirm the intended lighting arrangement, driver locations, access requirements, and any manufacturer-specific installation instructions before closing out the electrical rough-in stage.
10. Verify Appliance Dimensions and Required Clearances
Appliance dimensions should be confirmed before cabinets are installed. Even a correctly ordered cabinet package can create problems if the actual appliance specifications do not match the approved kitchen layout.
Review the dimensions and installation requirements for:
-
- Refrigerators.
- Dishwashers.
- Ranges and cooktops.
- Wall ovens.
- Built-in microwaves.
- Range hoods.
- Other integrated appliances.
Pay attention to more than width and height. Door swing, ventilation requirements, connection access, installation depth, and manufacturer-specified clearances can also affect the final arrangement.
For example, a refrigerator opening may need additional space for door movement and ventilation. A dishwasher must also have enough room for installation and future servicing.
Confirm the appliance specifications rather than relying on generic dimensions.
11. Complete Demolition, Wall Repairs, and Required Finishing Work
The installation area should be ready for cabinet placement. Where the project involves replacing existing cabinetry, confirm that demolition and necessary repairs have been completed.
Before installation, review:
-
- Removal of existing cabinets and countertops.
- Removal or modification of old backsplash materials, where required.
- Wall patching and surface repairs.
- Completion of approved framing changes.
- Required drywall and finishing work.
- Paint or primer work scheduled before cabinet placement.
- Removal of construction debris and unnecessary materials.
Some finishing activities are easier to complete while the room is empty. However, the exact sequence should be coordinated with the flooring, painting, and cabinet installation specifications.
Avoid scheduling unfinished demolition or major wall repairs during the cabinet installation window.
12. Prepare the Delivery, Storage, and Work Areas
Cabinet materials need suitable access and storage conditions before installation. A jobsite may be technically ready for installation but still create problems if the delivery vehicle cannot access the property or the materials have nowhere suitable to be stored.
Contractors should confirm:
-
- Delivery access and unloading arrangements.
- Available space for temporary cabinet storage.
- A clear route from the unloading area to the kitchen.
- Protection for completed floors and nearby finishes.
- Adequate lighting in the installation area.
- Safe access for workers and equipment.
- Protection from moisture and unsuitable storage conditions.
13. Organize Cabinets by Installation Sequence
For projects involving several cabinets or multiple kitchens, organize the materials according to the approved cabinet schedule.
Where practical, group items by:
-
- Kitchen or unit number.
- Cabinet type.
- Installation location.
- Product line and finish.
- Required installation sequence.
Keep doors, panels, fillers, hardware, and other components identifiable. For multifamily projects, clear labeling can reduce the time spent locating materials and help crews work through units more consistently.
Before moving materials into the work area, contractors should also confirm that the delivered shipment has been checked for missing or damaged components.
See our guide on how to inspect kitchen cabinets upon delivery for a more detailed receiving process.
14. Coordinate the Installation Schedule With Other Trades
Cabinet installation is connected to several other stages of kitchen construction. If different trades are working without a coordinated schedule, unfinished electrical, plumbing, flooring, or wall work may interrupt cabinet installation.
Before confirming the installation date, review the project schedule with the relevant contractors.
Consider the following:
-
- Plumbing rough-in completion.
- Electrical rough-in and required inspections.
- Wall repairs and surface finishing.
- Flooring installation sequence.
- Appliance delivery and availability.
- Cabinet delivery and inspection.
- Countertop templating and installation.
- Backsplash and final finishing work.
15. Plan Countertop Work Around Cabinet Readiness
Countertop templating generally takes place after the cabinets have been installed and adjusted to their intended final positions. The countertop supplier may require the cabinet installation to be complete and the cabinet surfaces to be ready for measurement.
Confirm the templating requirements with the countertop fabricator before scheduling the next stage. This helps avoid unnecessary scheduling conflicts and repeated site visits.
16. Complete a Final Jobsite Readiness Check
Before the installation crew arrives, complete a final review of the work area. The following checklist can help contractors confirm that the main preparation tasks have been addressed.
Kitchen Cabinet Installation Jobsite Checklist
Project Documents
-
- Latest approved cabinet layout is available.
- Cabinet schedule and specifications have been reviewed.
- Appliance dimensions and openings have been verified.
- Approved design changes have been communicated.
Walls and Floors
-
- Wall surfaces have been inspected.
- Required wall repairs have been completed.
- Stud locations have been identified and marked.
- Required blocking or backing has been verified.
- Floor conditions and installation sequence have been confirmed.
Plumbing and Electrical
-
- Plumbing rough-in work has been coordinated.
- Water supply and drain locations have been verified.
- Electrical connections have been reviewed.
- Appliance connections are in the correct locations.
- Under-cabinet lighting provisions have been checked.
Appliances and Finishing
-
- Appliance dimensions and clearances have been confirmed.
- Required demolition has been completed.
- Wall finishing work is ready.
- Flooring requirements have been reviewed.
Materials and Access
-
- Cabinet delivery has been coordinated.
- Delivered cabinets have been inspected.
- Materials have suitable storage conditions.
- The unloading and installation routes are clear.
- The installation area is clean and accessible.
Project Coordination
-
- Other trade work has been scheduled appropriately.
- The installation date has been confirmed.
- Outstanding site issues have been communicated.
- The responsible project contacts are available.
Not every item applies to every kitchen project. The final readiness decision should reflect the approved drawings, product specifications, project contract, and applicable local requirements.
Common Jobsite Preparation Mistakes Contractors Should Avoid
Even experienced contractors can encounter problems when preparation tasks are rushed or overlooked. Some common issues include:
Starting Installation Before Wall Repairs Are Complete
Damaged or uneven wall surfaces can make cabinet alignment more difficult. Complete necessary repairs and verify the installation surfaces before positioning the cabinets.
Overlooking Wall Stud Locations
Assuming that studs are positioned exactly where expected can create fastening problems. Locate and verify the actual framing conditions before installation.
Leaving Plumbing or Electrical Changes Until the Last Minute
Unfinished utility work can interfere with cabinet placement and create unnecessary coordination between trades. Review these requirements early.
Ignoring Finished Floor Height
The final flooring thickness can affect cabinet height and appliance clearances. Confirm the flooring system and installation sequence before work begins.
Using Outdated Cabinet Drawings
Construction changes can make earlier drawings inaccurate. Make sure the installation team has the latest approved layout and specifications.
Failing to Organize Delivered Materials
Unorganized cabinets and accessories can slow down installation, particularly on projects involving multiple kitchens. Establish a clear labeling and staging process before work begins.
Final Thoughts: A Better-Prepared Jobsite Supports a Smoother Cabinet Installation
Successful kitchen cabinet installation begins before the first cabinet is positioned. For contractors, proper preparation means reviewing approved drawings, evaluating wall and floor conditions, coordinating plumbing and electrical work, verifying appliance requirements, and organizing the jobsite for efficient installation.
A consistent preparation process can help reduce avoidable delays, improve coordination between trades, and make cabinet installation more predictable.
Whether you are remodeling a single kitchen or managing a larger multifamily development, taking time to confirm jobsite readiness can make the next stage of construction easier to manage.
At NextDAY Cabinets, we support contractors, builders, and remodeling professionals with kitchen cabinet solutions for residential and larger-scale projects.
Having the right cabinet specifications and project requirements in place helps create a more organized path from ordering to installation.
Frequently Asked Questions
1. What should be completed before kitchen cabinet installation?
Before installation, contractors should verify the approved cabinet layout, inspect wall and floor conditions, coordinate plumbing and electrical rough-ins, confirm appliance dimensions, and prepare the delivery and work areas.
2. Should flooring be installed before or after kitchen cabinets?
It depends on the flooring material and manufacturer requirements. Some flooring systems are installed before cabinets, while floating floors typically require specific clearance and movement provisions. Contractors should confirm the correct sequence before installation.
3. Do walls need to be perfectly level before cabinet installation?
Walls do not always need to be perfectly flat or square, but their conditions should be evaluated. Significant irregularities may require repairs, shimming, or other adjustments according to the cabinet installation specifications.
4. Why should contractors locate wall studs before installing cabinets?
Wall studs provide structural fastening points for many common cabinet mounting systems. Identifying their locations beforehand helps installers plan secure attachment and identify areas that may require additional blocking or backing.
5. Should plumbing and electrical work be completed before cabinets are installed?
Required rough-in work should generally be coordinated and completed before cabinet installation. This includes planned water supply, drain, electrical, lighting, and appliance connections. Work must follow applicable codes and be performed by qualified professionals where required.
6. When should countertops be measured after cabinet installation?
Countertop templating generally takes place after the cabinets have been installed and are ready for final measurement. The countertop fabricator’s specific requirements should determine the exact timing.
7. How should contractors prepare for cabinet installation in multifamily projects?
Contractors should organize cabinet schedules by building and unit, verify approved layouts, coordinate delivery phases, label materials, and confirm that each kitchen meets the required installation conditions. A consistent preparation process helps manage repeated layouts while accounting for unit-specific differences.
8. What happens if a jobsite is not ready for cabinet installation?
An unprepared jobsite can lead to installation delays, additional labor, scheduling conflicts, and adjustments to the construction sequence. Identifying outstanding issues before the installation crew arrives helps reduce these disruptions.