
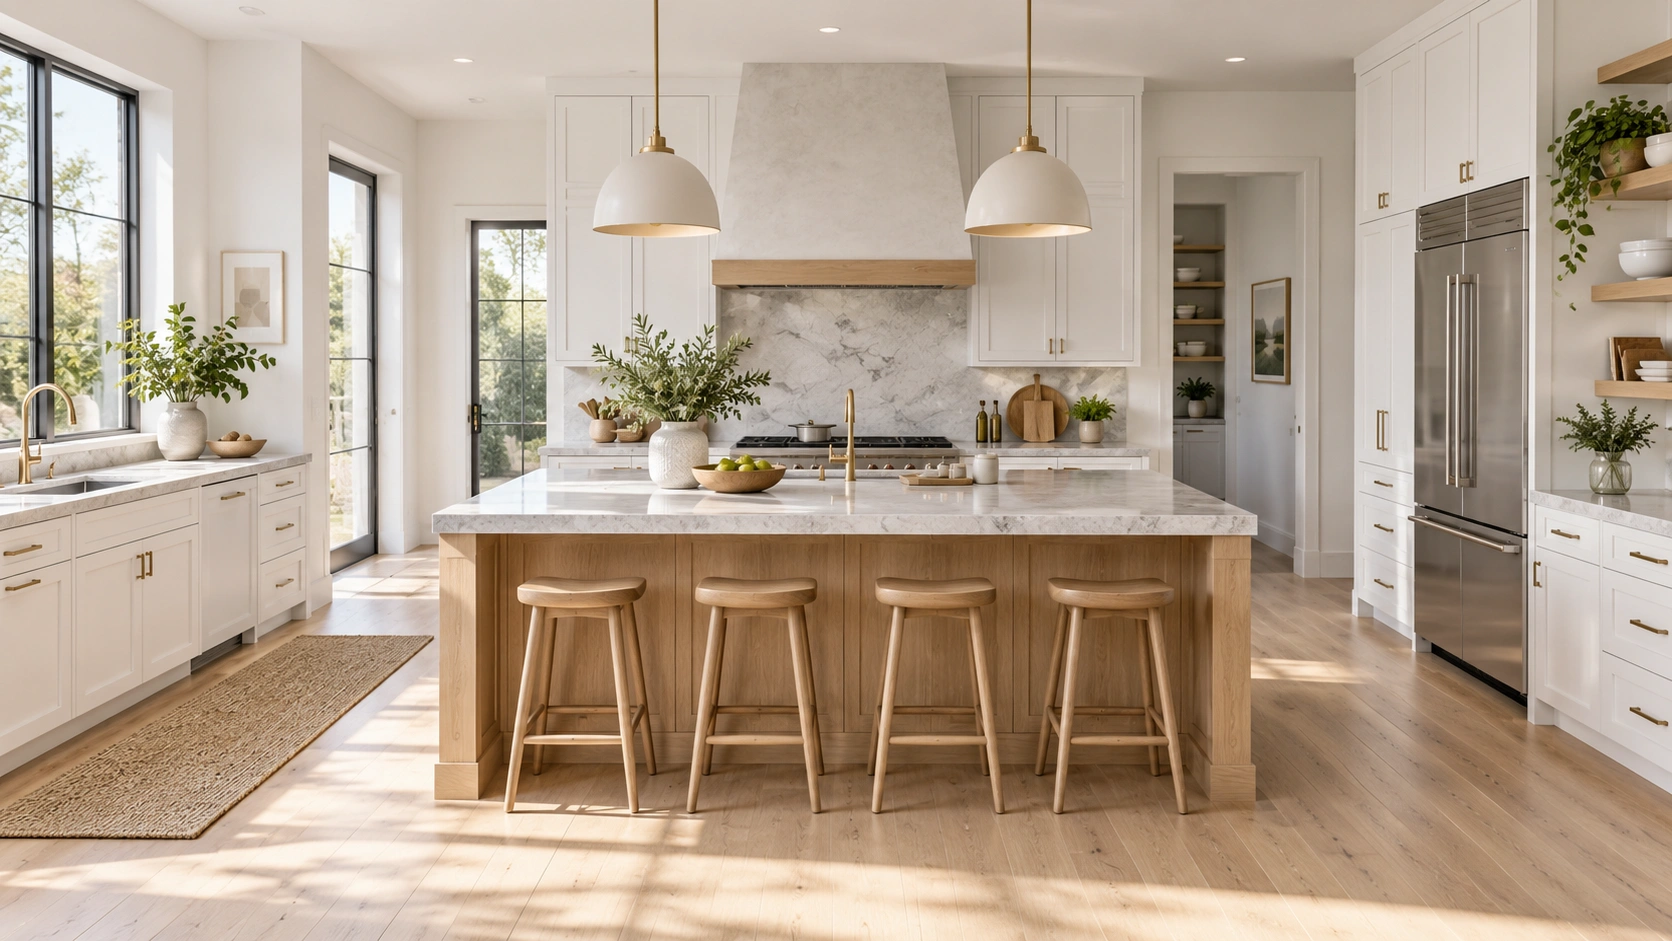
 Most kitchen island design advice starts with what to put in it. The question that decides everything comes earlier: whether the room can hold one at all.
An island needs clearance on every side you use, and that clearance is not negotiable. A room that cannot provide it does not get a smaller island. It gets a peninsula, or nothing.
This guide covers the clearances that decide feasibility, how to size an island once you know it fits, seating overhangs, what goes inside, and the cases where a peninsula outperforms an island in the same room.
The clearance arithmetic that decides everything
 Three numbers, applied before any other decision.
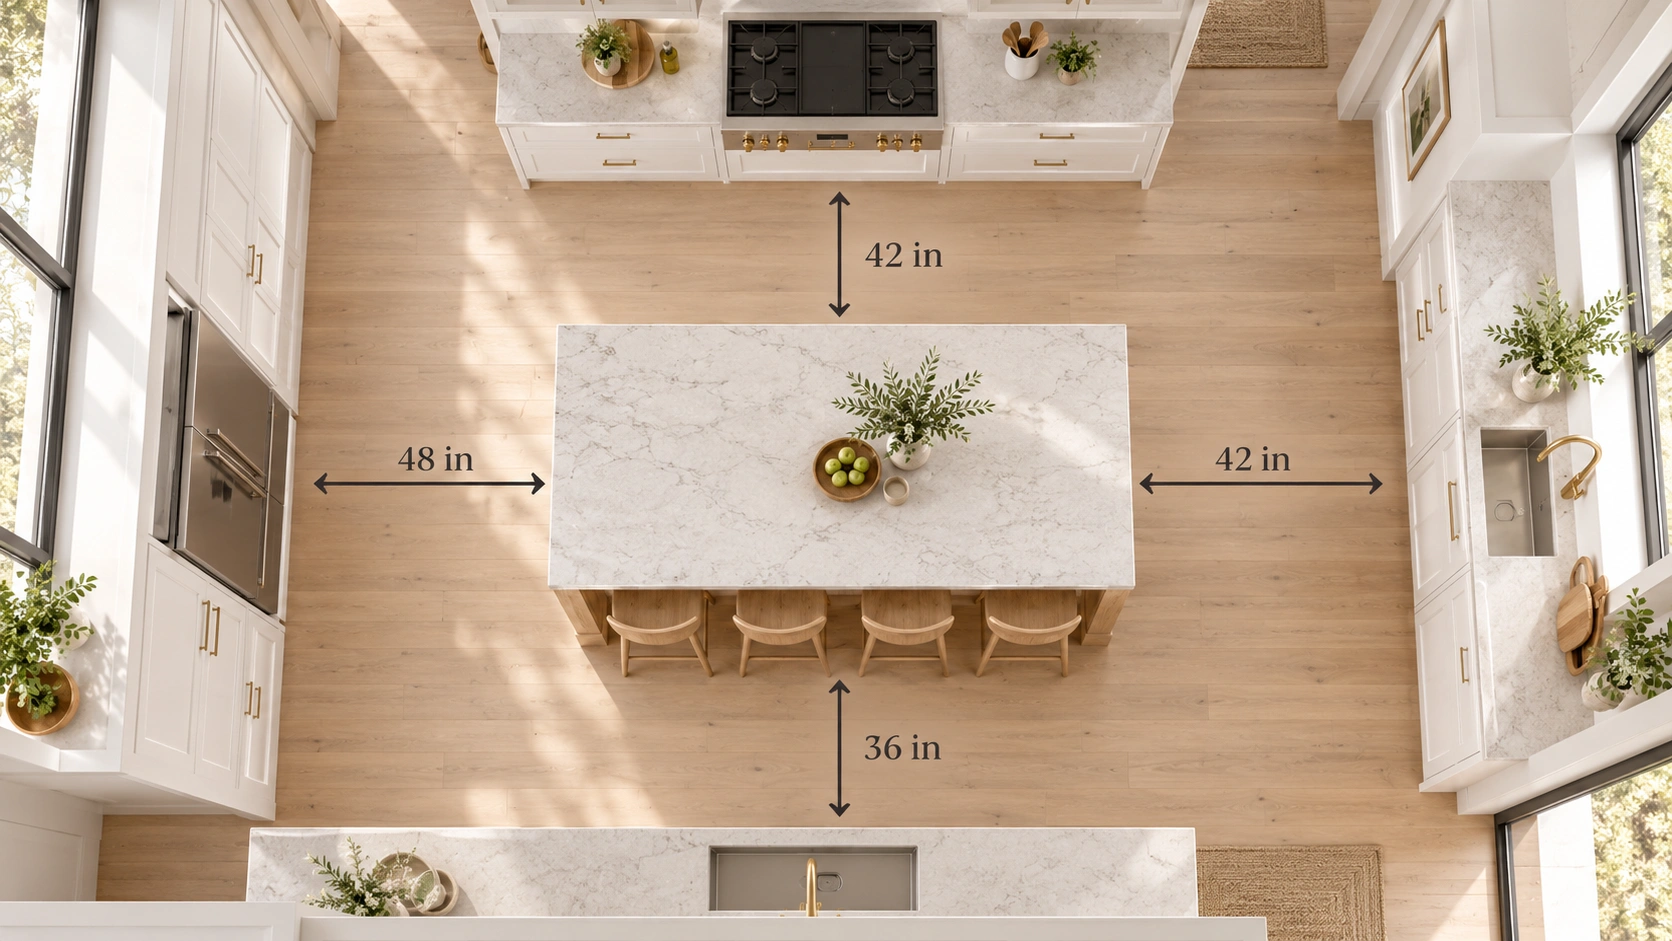
- 42 inches of clear walkway around an island in a one-cook kitchen.
- 48 inches where two people work at once, or where the island has seating on one side and a work aisle on the other.
- 36 inches is the absolute minimum on a side used only for passing, not for working.
Those figures are measured from the island edge to the opposing cabinet face, including any handle that projects, and they have to hold on every side you actually use. The NKBA Kitchen and Bathroom Planning Guidelines recommend a 42 inch walkway in a one-cook kitchen and 48 inches where two cooks work, which is where these figures come from.
Working out whether your room qualifies
The calculation is straightforward and most people skip it.
Take the room width. Subtract 24 inches of base cabinet depth for each wall that carries cabinetry, plus another inch or two for door and handle projection. Whatever is left is available for the island plus its clearances.
A modest island is 24 inches deep. In a room with cabinets on both facing walls:
24 + 42 + 24 + 42 + 24 = 156 inches, or 13 feet
That is the minimum room width for a small island with a working aisle on both sides. Not a generous island. A small one.
| Room width | Cabinets on | What fits |
|---|---|---|
| Under 11 ft | One or both walls | No island, consider a peninsula |
| 11 to 12 ft | One wall only | Small island possible, 24 in deep |
| 13 ft | Both walls | Small island, 24 in deep, 42 in aisles |
| 14 to 15 ft | Both walls | Standard island, 30 to 36 in deep |
| 16 ft and over | Both walls | Generous island, seating, 48 in aisles |
The number that surprises people is the first one. Below about 11 feet, an island makes the kitchen worse rather than better, and no amount of shrinking the island fixes it, because the clearances are what they are.
Island size once you know it fits
With clearance confirmed, the island itself has a workable range.
- Depth. 24 inches is a single run of base cabinets. 36 to 42 inches allows cabinets back to back, which roughly doubles the storage. Beyond about 48 inches the centre becomes hard to reach across and the surface stops being useful.
- Length. 4 feet is the practical minimum for the island to justify itself. 6 to 8 feet is the common range. Beyond 10 feet, people start walking around it rather than to it, and splitting into two islands or an island plus a peninsula is usually better.
- Height. 36 inches matches standard counter height and suits food preparation. 42 inches is bar height and suits standing and conversation rather than work. A two-level island with a 36 inch working surface and a 42 inch bar was common for years and now reads as dated, and it also wastes the depth that the level change consumes.
| Island depth | Configuration | Storage |
|---|---|---|
| 24 in | Single row of base cabinets | One side only |
| 30 in | Base cabinets plus a small overhang | One side, limited seating |
| 36 in | Base cabinets back to back, or cabinets plus 12 in seating overhang | Both sides, or one side plus seating |
| 42 in | Cabinets back to back plus overhang | Both sides plus seating |
| 48 in+ | Rarely useful | Centre becomes unreachable |
Seating: overhang and spacing
 Seating is the most requested island feature and the most commonly under-dimensioned.
Overhang depth by seat height:
| Seat height | Counter height | Overhang needed |
|---|---|---|
| Standard chair, 18 in | 30 in table height | 18 in |
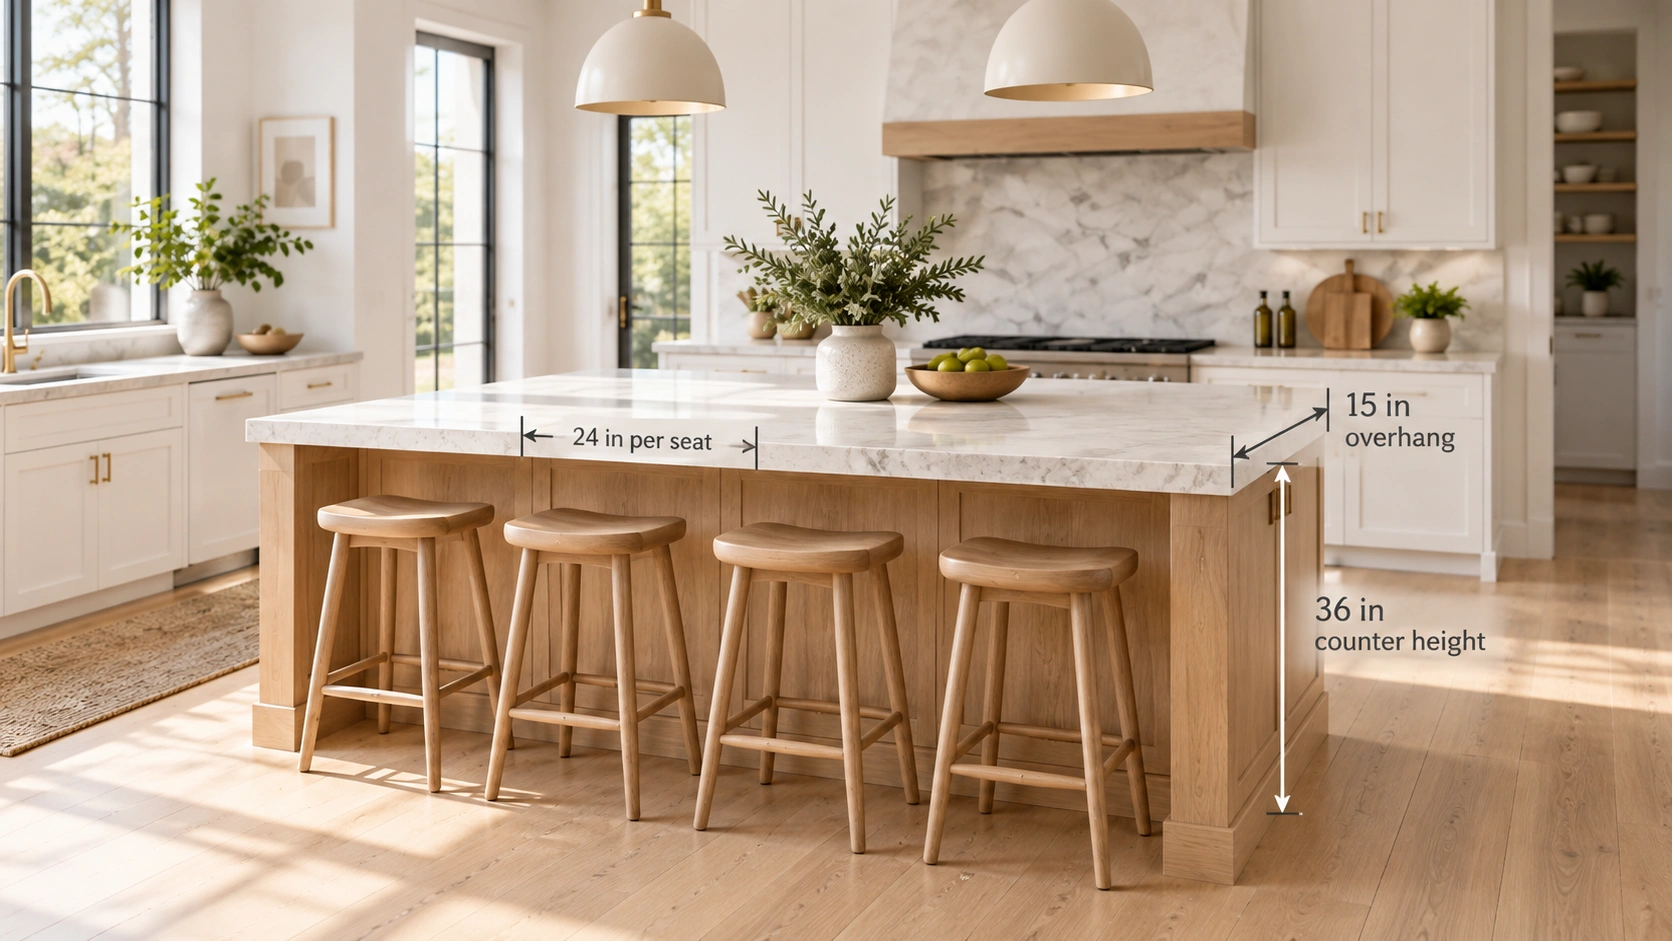
| Counter stool, 24 in | 36 in counter | 15 in |
| Bar stool, 30 in | 42 in bar | 12 in |
Anything less than 12 inches and there is nowhere for knees to go, which is why people end up sitting sideways at an island that looked fine on a drawing.
- Width per seat. 24 inches is the minimum, 30 inches is comfortable. A 6 foot island seats three people comfortably at 24 inches each, or two at 30 inches with room at the ends.
- Structural support. An overhang beyond about 12 inches on a stone counter needs support: corbels, a steel plate set into the cabinet, or a leg. This is decided at design stage because the support is built in, and it is the detail that most often gets discovered late.
- Clearance behind a seated person. Add 36 inches behind the stools for someone to walk past. That is on top of the island depth and it is why seating on the aisle side of a tight kitchen does not work.
What goes inside the island
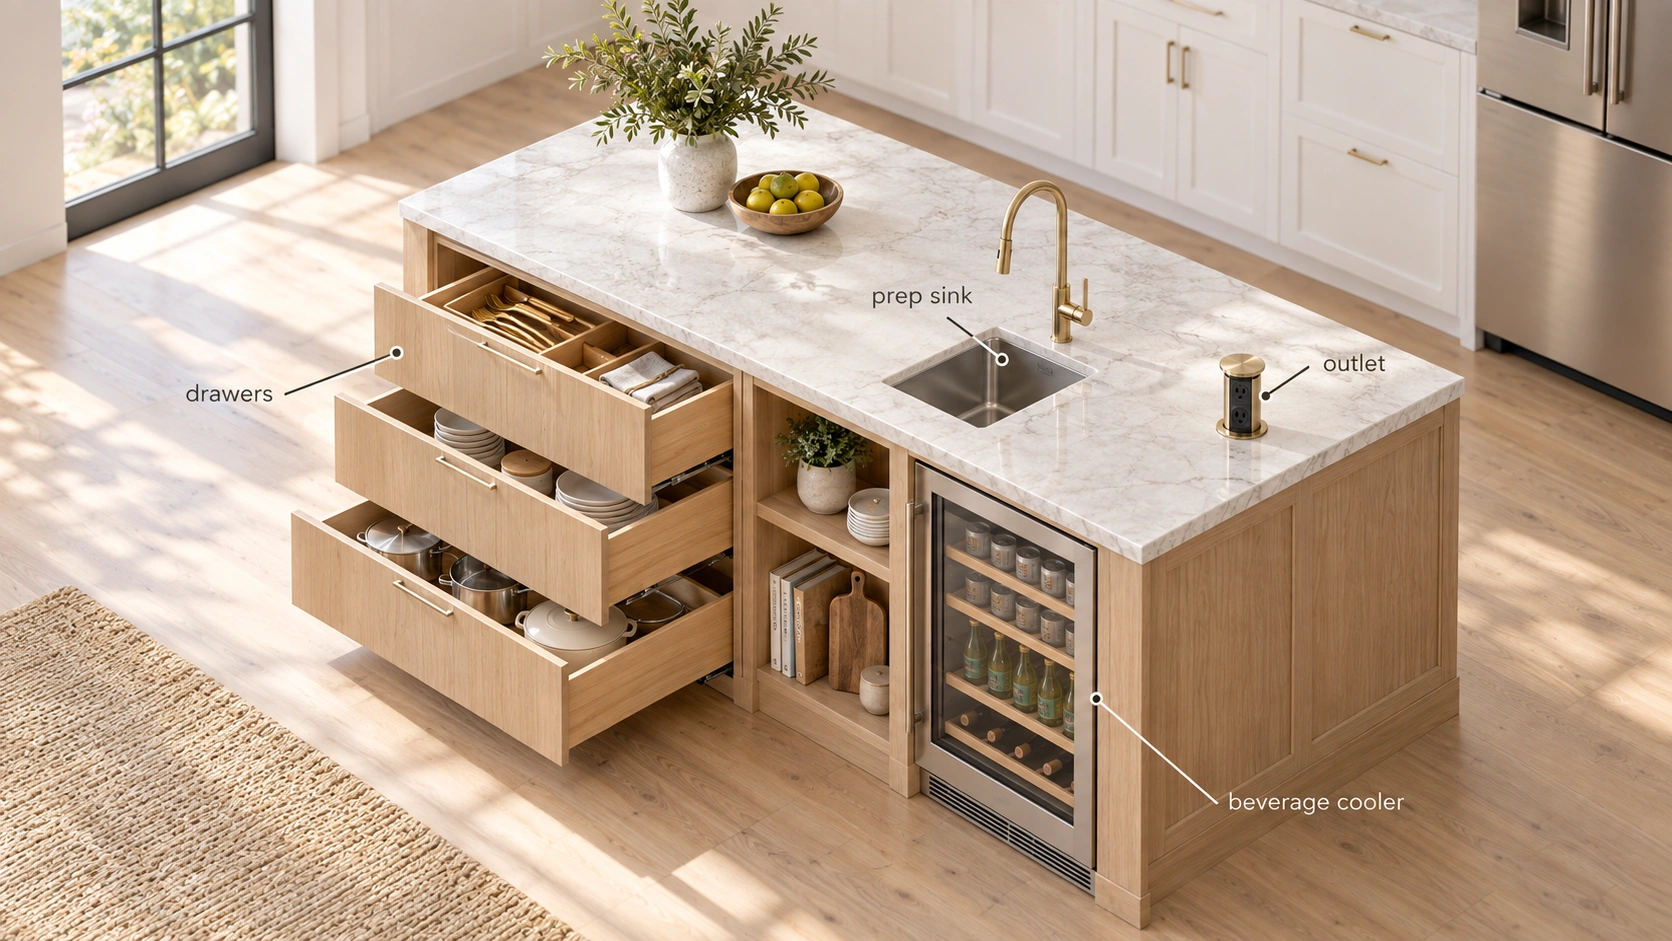 The configuration decision is more consequential than it appears, because it determines the plumbing and electrical work.
Storage only
The simplest and often the best. No plumbing, no ventilation, no appliance to work around. Drawers on the working side, and either drawers or open shelving on the seating side.
Drawers beat doors here decisively. An island is approached from multiple directions and a door that swings into a walkway is a daily irritation.
Island sink
Popular and it adds plumbing and drainage to the middle of the floor. Where the slab or the joists cooperate, it is straightforward. Where they do not, it is the single most expensive decision in the kitchen.
A prep sink at 15 to 18 inches suits an island better than a full sink, because it leaves usable counter on both sides.
Island cooktop
Adds ventilation to the requirement, and that is the real cost. A downdraft is less effective than an overhead hood and a hood over an island is a visible piece of equipment in the middle of the room.
Worth being clear-eyed about: an island cooktop puts heat, spatter and steam in the centre of a space people also sit at.
Beverage or refrigeration
An undercounter refrigerator or beverage cooler in an island is a good use of the space furthest from the main working zone, and it keeps people out of the cook’s way.
Power. An island with any appliance, and increasingly any island at all, needs outlets. Requirements for receptacle placement at island countertops are set by the electrical code and have changed in recent cycles, so confirm the current requirement with your electrician rather than assuming. Where they go is a design decision, since a standard outlet in the side panel of a nice island is visible. Options include a recessed pop-up, outlets in the overhang underside, or integration into a seating panel.
Our cabinet lines include finished end and back panels, which matter more on an island than anywhere else in the kitchen because all four sides are visible.
Finished panels and the detail that gives islands away
An island is seen from every direction, which changes the specification.
- All four sides need finishing. A cabinet run against a wall has one finished end. An island has two ends and a full back. Those panels are a real line item and they are the thing most often missing from a quote priced per linear foot.
- Toe kick. On a run against a wall, the toe kick is recessed on one side. On an island, the seating side usually has no toe kick at all, because a recess there collects debris and people kick it. A flush panel or a furniture base reads better.
- Countertop overhang on the non-seating sides. A small overhang, around an inch, keeps spills off the cabinet face. It is easy to omit and awkward to add later.
Two-tone islands remain popular and they work for a practical reason: an island in a darker finish hides the scuffing that the most-used surface in the kitchen inevitably collects, while lighter perimeter cabinets keep the room open.
When a peninsula is the better answer
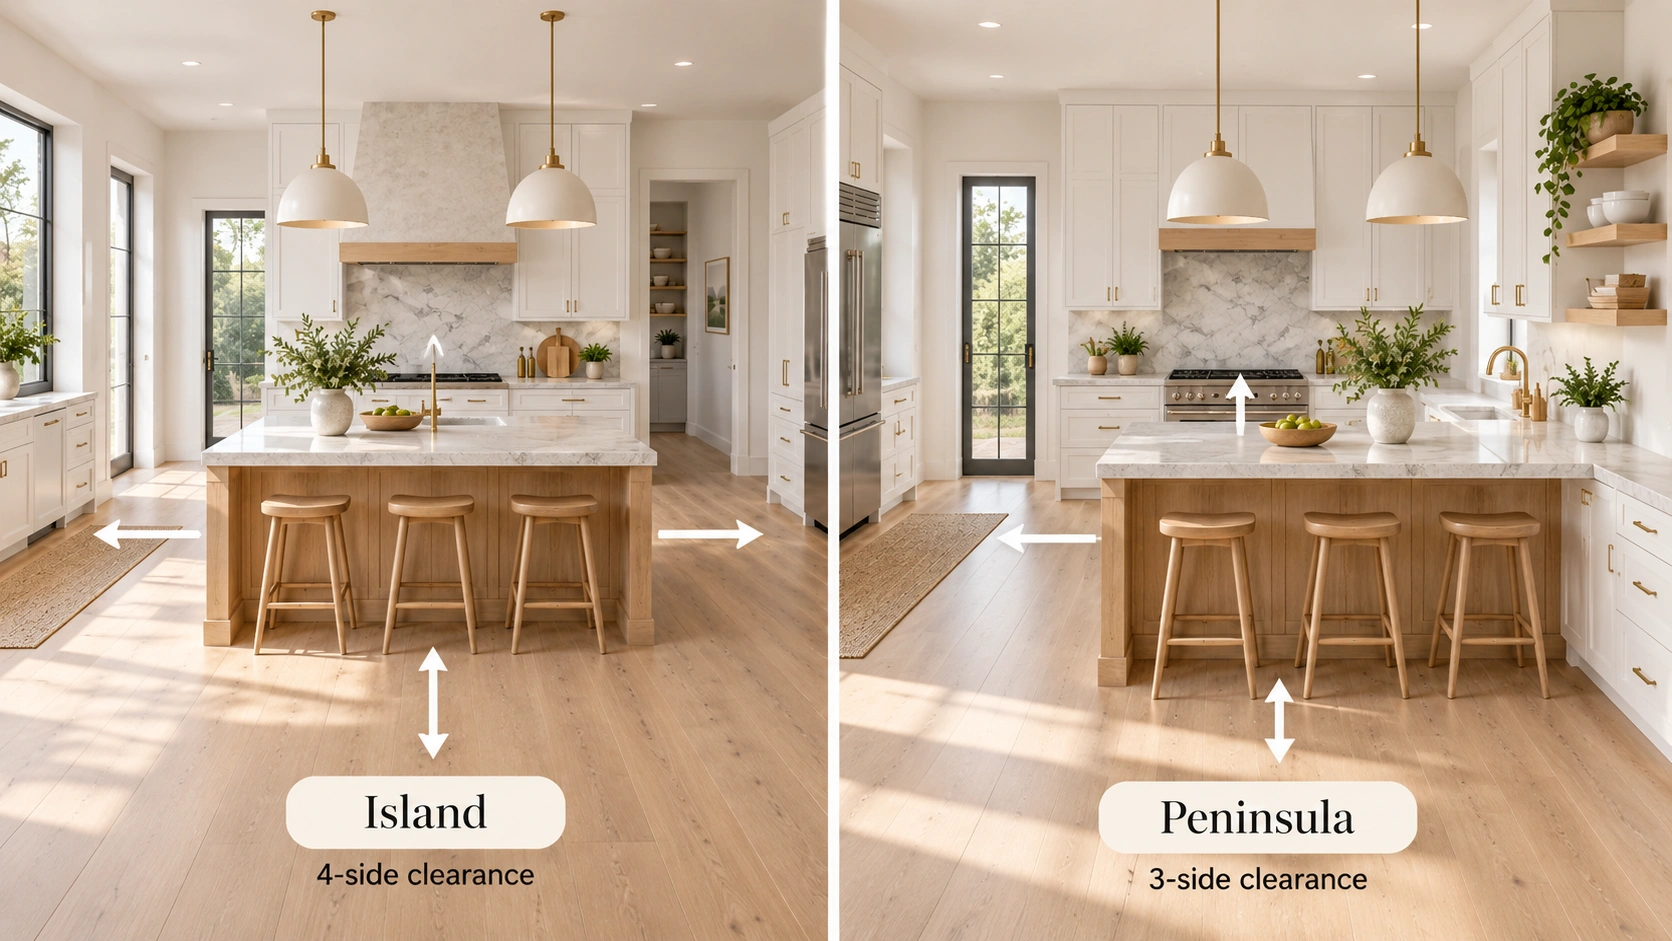 This is the section most island articles avoid.
A peninsula is attached to the perimeter run at one end and projects into the room. It needs clearance on three sides rather than four, which changes the arithmetic substantially.
- Room width required for a peninsula: roughly 3 to 4 feet less than for an island, because one side is against existing cabinetry rather than requiring a walkway.
- What you keep: the additional counter, the additional storage, the seating, and the visual separation between the kitchen and an adjoining room.
- What you lose: the ability to walk around it, which in a busy kitchen matters more than people expect, and a certain amount of the open feel an island gives.
| Island | Peninsula | |
|---|---|---|
| Minimum room width | ~13 ft | ~9 to 10 ft |
| Clearances needed | Four sides | Three sides |
| Circulation | Walk around | Walk around one end |
| Seating | Any side | Usually one side and the end |
| Plumbing and power | Runs through the floor | Can run through the connected wall |
| Cost of services | Higher | Lower |
The services point is worth dwelling on. A peninsula connected to a perimeter run can often take power and plumbing through the adjoining cabinetry and wall. An island requires everything to come up through the floor, which on a slab means cutting concrete.
In a room under about 13 feet wide, a peninsula is not a compromise. It is the correct answer, and it frequently delivers more usable counter than a squeezed island would.
Lighting and the island
An island is a work surface and a gathering point, and it needs lighting for both.
- Task lighting over the working area. Recessed downlights positioned over the counter rather than over the edge, because a light directly above where you stand puts your own shadow on the board.
- Decorative pendants are the most common choice and the most commonly mis-sized. The guidance that works: hang the bottom of the pendant roughly 30 to 36 inches above the counter, which clears sight lines across the island while still lighting the surface. Space them evenly with the outer pendants set in from the island ends rather than aligned with them.
- How many pendants. Two over a 6 foot island, three over an 8 foot island, or a single linear fixture where the island is long and the room is contemporary. Three small pendants over a 4 foot island reads as cluttered.
- Colour temperature in the neutral to warm range, matching the rest of the kitchen. An island lit noticeably cooler than the perimeter looks like an afterthought.
All of it is easier to plan while the ceiling is accessible, which means during the project rather than after.
Ventilation, if the island carries a cooktop
Worth its own section because the cost surprises people.
- An overhead island hood is the effective option. It has to be ducted to outside, which means a run through the ceiling and either through the roof or across to an exterior wall. That route is the expense, and in a house with living space above it can be substantial.
- A downdraft rises from behind the cooktop and extracts at counter level. It preserves the sight lines an overhead hood interrupts, and it is less effective, because it is working against the direction heat and steam naturally travel.
- Recirculating filters and returns the air to the room rather than removing it. It handles grease reasonably and does nothing about heat or moisture. It is the fallback where ducting is genuinely impossible.
The practical sequence: establish whether a duct route exists before committing to an island cooktop. If it does not, the honest answer is often to keep the cooktop on the perimeter wall where ducting is straightforward, and use the island for preparation and seating instead.
Common mistakes
- Designing the island before measuring the clearances. The room decides, not the drawing.
- Seating on the aisle side. Stools need 36 inches behind them on top of the island depth.
- An overhang under 12 inches. There is nowhere for knees, so nobody sits there.
- Forgetting structural support for a stone overhang. It has to be built in, not added.
- Doors rather than drawers. An island is approached from several directions and a swinging door blocks one of them.
- Omitting the finished back and end panels from the budget. All four sides are visible.
- Putting the cooktop in the island by default. It adds ventilation cost and puts heat where people sit.
- A two-level island. It reads as dated and it wastes depth on the level change.
Frequently asked questions
How much clearance do you need around a kitchen island?
Forty-two inches for a one-cook kitchen and 48 inches where two people work at once or where one side carries seating. Thirty-six inches is the absolute minimum on a side used only for passing. Measure from the island edge to the opposing cabinet face, including handle projection.
How big does a kitchen need to be for an island?
Roughly 13 feet wide as a minimum with cabinets on both facing walls, which allows a 24 inch island with 42 inch aisles. Below about 11 feet an island makes the kitchen worse, and a peninsula is the better answer.
What is the standard size of a kitchen island?
Depth of 24 to 42 inches and length of 4 to 8 feet, at 36 inches high to match counter height. Twenty-four inches deep takes one row of base cabinets; 36 inches allows cabinets back to back or cabinets plus a seating overhang.
How much overhang do you need for island seating?
Fifteen inches for 24 inch counter stools at a 36 inch counter, and 12 inches for 30 inch bar stools at a 42 inch bar. Anything under 12 inches leaves nowhere for knees. An overhang beyond about 12 inches on stone needs structural support built in.
How many people can sit at a kitchen island?
Allow 24 inches per seat as a minimum and 30 inches for comfort. A 6 foot island seats three comfortably at 24 inches each, or two at 30 inches. Also allow 36 inches of clearance behind the stools for someone to walk past.
Should a kitchen island have a sink or a cooktop?
Only where the services justify it. A sink adds plumbing and drainage in the middle of the floor, which on a slab means cutting concrete. A cooktop adds ventilation and puts heat and spatter where people sit. Storage-only islands avoid both and are frequently the better result.
Is an island or a peninsula better?
It depends on room width. An island needs roughly 13 feet, a peninsula around 9 to 10, because one side is against existing cabinetry. A peninsula also takes power and plumbing through the connected wall rather than through the floor, which is considerably cheaper.
Do you need finished panels on a kitchen island?
Yes, on both ends and the back, because all four sides are visible. These panels are a real line item and they are the thing most often missing from a quote priced per linear foot.
Getting the size right
The order that works: measure the room, subtract the cabinet depths, check what remains against the clearance figures, and only then decide what the island contains.
Done that way you will know within five minutes whether you are designing an island or a peninsula, and that single answer prevents most of the disappointment in this part of a kitchen project.
If the room qualifies, the remaining decisions are about what you cook and how many people sit. If it does not, a peninsula in the same room will give you more usable counter than a squeezed island would.
Bring your measurements to any of our showrooms in Chantilly, Alexandria, Woodbridge, Richmond, Beltsville or Chicago and we will test the arithmetic against your room before anything is designed.
Browse the full range, see our standard cabinet sizes chart, or read what drives the number in our guide to kitchen cabinet cost.
Trade professionals can use our professional design services for layout support.