
Painting your kitchen cabinets is one of the few remodel projects that can change the whole room for a few hundred dollars. It is also one of the easiest to get wrong.
Most failed paint jobs we see come back to the same three shortcuts: skipping the degreaser, skipping the primer, or rushing the dry time between coats.
The good news is that none of this is hard. It is just slow. If you give the job a full week and follow the steps in order, you can get a finish that looks close to factory-sprayed and holds up to years of daily use.
This guide walks you through the whole process the way our showroom team explains it to homeowners and contractors. You will learn when painting makes sense (and when it doesn’t), what to buy, which paint actually survives a kitchen, and the exact order of work from empty cabinet box to rehung doors.
Should You Paint or Replace Your Cabinets?
Paint fixes color. It does not fix structure. Before you buy a single brush, open every door and drawer and take an honest look at the boxes behind them.
Painting is a good choice when:
-
- The cabinet boxes are solid wood or plywood and still square
- Doors close flush and hinges hold their adjustment
- You like the layout and only hate the color or the dated stain
- The doors are solid wood, MDF or a painted finish already
Replacement usually makes more sense when:
-
- The sink base is swollen or soft from past water leaks
- Shelves sag or the face frames are separating
- The doors are thermofoil or high-gloss laminate, which paint does not grip well
- You want a new layout, a bigger island or more storage
If you are on the fence, our guide on how long kitchen cabinets last covers the warning signs in detail. You can also compare the numbers in cabinet refacing vs. replacement and check current kitchen cabinet cost per linear foot. Sometimes a new set of ready-to-assemble cabinets costs less than people expect, especially once you factor in a week of your own labor.
Tools and Materials You’ll Need
Gather everything before you start. Running to the hardware store with wet primer on half the doors is how mistakes happen.
Prep
-
- Screwdriver or drill, painter’s tape and a marker for labeling
- Zip-top bags for hinges and screws
- Degreaser (a TSP substitute or a dedicated cabinet degreaser)
- Lint-free rags, a bucket and clean water
- Wood filler and a flexible putty knife
- Sanding sponges or sandpaper in 120, 180 and 220 grit
- Tack cloths and a shop vacuum
- Drop cloths and plastic sheeting
Painting
-
- Bonding primer (shellac-based or a high-adhesion waterborne primer)
- Cabinet-grade enamel paint
- A 2 to 2.5 inch angled sash brush with synthetic bristles
- A 4 inch foam or microfiber mini roller with several spare covers
- Painter’s pyramids or a drying rack so doors can dry flat
- Paintable caulk for gaps along face frames
A paint sprayer is optional. It gives the smoothest finish, but it adds masking time and a learning curve. For a first project, a good brush and roller will get you a result you’ll be happy with.
Choosing the Right Paint for Kitchen Cabinets
This is where most DIY projects are won or lost. Regular wall paint stays slightly soft and sticky even when it feels dry. On a cabinet door that gets grabbed fifty times a day, it chips at the edges and picks up fingerprints within months.
Paint type
| Paint type | Durability | Ease of use | Best for |
|---|---|---|---|
| Waterborne alkyd (hybrid enamel) | High | Easy cleanup, levels well | Most DIY cabinet projects |
| Oil-based enamel | Very high | Strong odor, slow dry, yellows over time | Older homes, dark colors |
| 100% acrylic enamel | Medium to high | Fast dry, easy to use | Low-traffic cabinets, bathrooms |
| Wall latex | Low | Easy | Not recommended for cabinets |
For most kitchens, a waterborne alkyd is the sweet spot. It brushes on like latex, cleans up with water, and cures hard like oil. It also self-levels, which hides brush marks.
Sheen
Satin and semi-gloss are the two practical choices. Satin hides small flaws and looks more modern. Semi-gloss is easier to wipe clean but shows every dent and brush stroke. Avoid flat and eggshell finishes on cabinets; they stain easily and do not stand up to scrubbing.
Color
Warm whites, greige and soft greens remain the safest picks for resale. Deep navy, forest green and charcoal work beautifully on islands or lower cabinets. For ideas, browse our roundups of kitchen cabinet color trends, dark kitchen cabinet ideas and two-tone kitchen cabinets. Always paint a sample board and look at it in morning and evening light before committing.
How to Paint Kitchen Cabinets: Step by Step
Step 1: Empty the cabinets and set up a work area
Clear out every shelf and drawer. Cover the countertops, floor and appliances with drop cloths. Then set up a separate spot for the doors, ideally a garage or spare room with good airflow and steady temperature. Most enamels want somewhere between 50 and 85 degrees Fahrenheit to dry properly.
Step 2: Remove doors, drawers and hardware
Take off every door and drawer front. Number each one with a piece of tape, and write the matching number inside the cabinet box where the hinge was. Put hinges and screws in labeled bags. This sounds fussy, but doors that look identical rarely are. Getting them back in the right spot saves you an hour of hinge adjustment at the end.
Step 3: Degrease everything
Kitchen cabinets carry a thin film of cooking grease, especially near the range and around handles. Paint will not bond to it, no matter how good the primer is. Scrub every surface with a degreaser, rinse with clean water, and let it dry completely. Pay extra attention to the edges of doors and the area above the stove.
Step 4: Repair and fill
Fill dents, gouges and old hardware holes with wood filler. If you are switching from knobs to pulls, fill the old holes now and drill the new ones after painting. Let the filler dry fully, then sand it flush. Run a thin bead of paintable caulk along any gaps where face frames meet walls or panels.
Step 5: Sand to scuff, not to strip
You are not trying to remove the old finish. You are trying to dull it so primer has something to grip. Go over every surface with 120 or 150 grit, then smooth with 180. Factory finishes can be tough, so spend a little more time on glossy areas. When you’re done, vacuum everything and wipe with a tack cloth. Dust is the enemy of a smooth finish.
Step 6: Prime
Apply one coat of bonding primer to boxes, face frames, doors and drawer fronts. On oak or other open-grain wood, the grain will telegraph through the paint unless you fill it first with a grain filler or several coats of a high-build primer. If your cabinets have knots or tannin-rich wood, a shellac-based primer will stop bleed-through. Let the primer dry according to the label, then lightly sand with 220 grit and tack off the dust.
Step 7: Paint the cabinet boxes and face frames
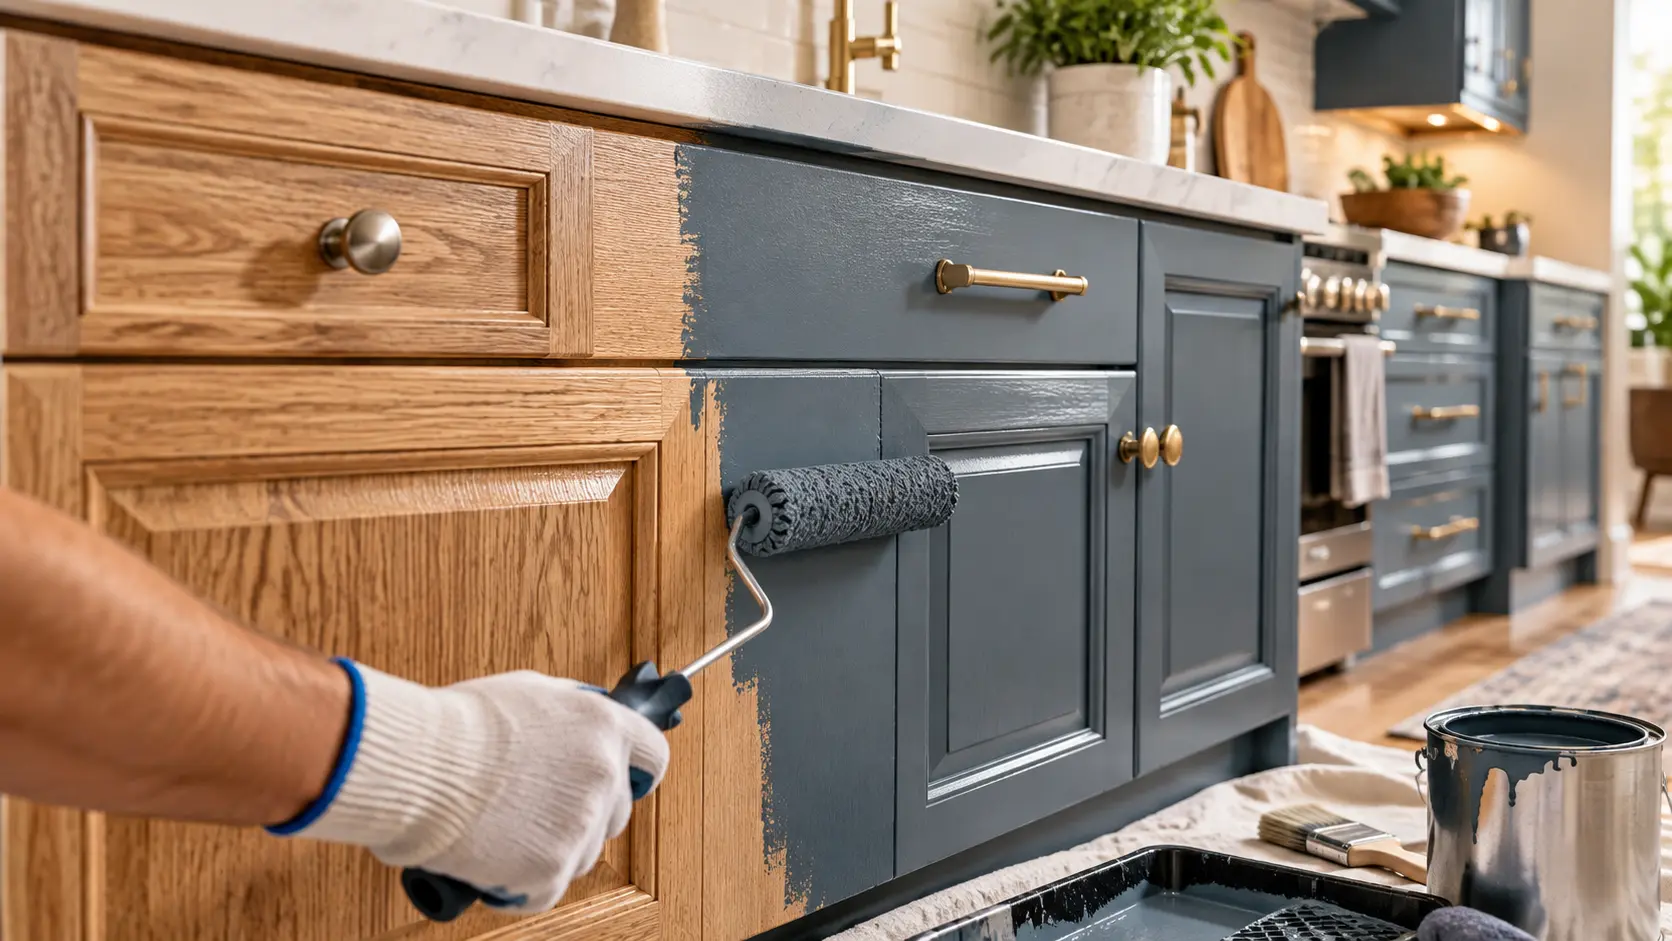
Work from the top down and from the inside out. Use the brush to cut into corners and profiles, then roll the flat areas while the brushed paint is still wet. Keep coats thin. Two thin coats always beat one thick coat that sags and stays soft.
Step 8: Paint the doors and drawer fronts
Paint the back of each door first. Start with the recessed panel, then the rails (horizontal pieces), and finish with the stiles (vertical pieces). Following the direction of the wood keeps brush marks in line with the grain, so they read as natural instead of sloppy. On Shaker-style doors, watch the inside corners of the panel for drips and pooling. Once the backs are dry, flip the doors and repeat on the fronts.
Step 9: Sand lightly and apply the second coat
Respect the recoat time on the can. Waterborne alkyds often need 16 hours or more between coats, even when they feel dry in two. Before the second coat, give everything a very light pass with 220 grit or a fine sanding sponge and wipe off the dust. Apply the second coat the same way as the first. Dark colors sometimes need a third.
Step 10: Let it cure, then reinstall
Dry is not the same as cured. Most cabinet enamels take several weeks to reach full hardness. Wait at least two to three days before rehanging doors, and be gentle for the first month. Add new hinges and hardware now if you are upgrading. Fresh knobs and pulls in brushed brass or matte black can make a painted kitchen look like a full remodel.
Common Mistakes to Avoid
After years of talking with homeowners who tried this on their own, we hear the same stories again and again.
- Painting over grease. The paint looks fine for a few weeks, then peels in sheets near the stove and handles.
- Skipping primer because the paint says “paint and primer in one.” Those products are built for walls, not for slick factory finishes.
- Rehanging doors too soon. Doors stick to the face frames and the paint tears where they touch.
- Loading the brush too heavily. Thick coats sag, drip and take far longer to harden.
- Ignoring the grain on oak. Painted oak without grain filling still looks like oak, just white.
- Painting in a cold garage. Below the minimum temperature on the label, the paint will not level or cure properly.
- Forgetting the inside edges. Open a door and the unpainted edge is the first thing guests notice.
How Much Does It Cost and How Long Does It Take?
The figures below are typical ranges for an average 10×12 foot kitchen. Your numbers will vary with region, cabinet count and paint brand.
| Option | Approximate cost | Time | Finish quality |
|---|---|---|---|
| DIY brush and roller | $200 to $600 | 5 to 7 days | Good, with some brush texture |
| DIY with sprayer | $400 to $900 | 4 to 6 days | Very smooth, more prep |
| Professional painter | $3,000 to $8,000 | 3 to 5 days | Near factory |
| New factory-finished cabinets | Varies by line | Fast with in-stock lines | Factory, with warranty |
Notice the last row. If a professional paint job is on the table, it is worth pricing new cabinets at the same time. A factory-applied finish is baked and cured under controlled conditions, so it outlasts any brushed paint.
Our custom paint program lets you pick almost any color and get it on brand-new boxes, and our kitchen cabinet materials guide explains which constructions hold paint best.
Caring for Painted Cabinets
For the first 30 days, wipe spills with a soft damp cloth only. After the paint cures, a mild dish soap solution handles almost everything. Skip abrasive pads, ammonia cleaners and magic erasers, which slowly dull the sheen. Keep a small jar of leftover paint labeled with the color and sheen for touch-ups. For more tips, see our cabinet care guide.
Final Thoughts
Painting kitchen cabinets rewards patience more than skill. Clean thoroughly, prime every surface, keep your coats thin and give the paint time to cure. Do that, and a weekend project becomes a finish you’ll still like years from now.
If your inspection turned up swollen boxes, sagging shelves or a layout that no longer works, painting may only delay the inevitable. That is where we can help.
Visit any of our NextDAY Cabinets showrooms to see painted finishes in person, request a sample door in the color you’re considering, or book a session with our professional design services team. And if you’re planning a bigger change, start with our step-by-step guide on how to remodel your kitchen.
Frequently Asked Questions
Do I have to sand kitchen cabinets before painting?
Yes, at least a light scuff sanding. Liquid deglossers can help on detailed profiles, but they don’t replace sanding on flat surfaces. Paint needs a dull, slightly rough surface to grip.
Can I paint cabinets without removing the doors?
You can, but the results are noticeably worse. Paint pools in the hinge areas, the edges stay unpainted, and doors often stick to the frames. Taking them off adds an hour and saves days of frustration.
What is the most durable paint for kitchen cabinets?
Oil-based enamel is the hardest, but waterborne alkyd enamels come very close without the odor and yellowing. For most homes, a waterborne alkyd is the best balance.
How many coats of paint do kitchen cabinets need?
One coat of primer and two coats of paint is standard. Dark colors over light primer, or light colors over dark wood, may need a third.
Can you paint laminate or thermofoil cabinets?
Laminate can be painted with a strong bonding primer and careful prep. Thermofoil is risky because the vinyl layer often peels on its own over time, taking the paint with it. In most cases, replacing thermofoil doors is the better investment.
How long does painted cabinet finish last?
A well-prepped DIY job typically lasts 5 to 10 years before it needs touch-ups. Factory-finished cabinets usually last much longer.